Determination
of
Biological
Oxygen Demand (BOD)
Laboration
K0016K Chemical principles
2015-12-10
Summary
This laboration was performed to measure the contamination of a water
sample picked from the canal of lulsund. By using the oxygen’s ability to
oxidize manganese(II)ions, a BOD (Biological Oxygen Demand) could be
established for the sample. The measured BOD was subsequently compared with a
table that indicated the approval stages for water quality which clarified the
sample either polluted or clear. From several laborational stages, the
result appeared as a failure due to the extra adding of oxygen before the
actual test begun. Apparently the BOD showed to be a negative value, close to
zero due to the extra oxygen in the sample.
The BOD value measured for the samples is calculated to: -0, 54 mg/dm3, respectively -0, 15 for the two samples. Compared to the table of approval values for water contamination this appears to be unrealistic.
Table of Contents
1 Background
2 Introduction & theory
3 Materials & method
3.1 Sample titration
3.2 Iodometric titraion
4 Calculations
5 Results and discussion
References
1 Background
BOD or Biochemical Oxygen Demand is a
widely used term of measure the organic quality of water. Although the term
“BOD” is not a precise quantitative term, the measurement makes a simple way to
determine the organically quality for a water sample. BOD indicates how much
oxygen is needed for the microbiological decomposition of the organic material
in water. The value of BOD can show how contaminated a water sample is. This
contamination could be faecal matter or dissolved organic carbon derived from
non-human and animal sources. A high BOD result can lead to complications such
as poor eco-system health or human ill health (Penn et al. 2003).
2 Introduction & theory
The aim of this laboration is to
determine the concentration of oxygen O2 in a water sample. Table 1 shows (BOD)
was determined by setting up several chemical reactions described below to
easily decide the amount of oxygen in the sample.
Table 1: Guiding lines for quality of water.
BOD
|
|
0 - 1 mg/dm3
|
Uncontaminated fresh water.
|
1 – 3 mg/dm3
|
Relatively uncontaminated water.
|
3 – 5 mg/dm3
|
Doubtful quality.
|
> 5 mg/dm3
|
Clearly contaminated.
|
When
air is bubbled through water, oxygen will dissolve to a saturation level. The
equilibrium will be attained.

To determine the content of we utilize oxygen’s ability to oxidize
manganese(II)ions. A with precipitation is formed in the absence of dissolved
oxygen by mix the manganese(II) ions with an alkaline iodide solution such as
hydroxide
we utilize oxygen’s ability to oxidize
manganese(II)ions. A with precipitation is formed in the absence of dissolved
oxygen by mix the manganese(II) ions with an alkaline iodide solution such as
hydroxide or Iodide
 and hence a white precipitation
is formed.
and hence a white precipitation
is formed.
we utilize oxygen’s ability to oxidize
manganese(II)ions. A with precipitation is formed in the absence of dissolved
oxygen by mix the manganese(II) ions with an alkaline iodide solution such as
hydroxide or Iodideand hence a white precipitation
is formed.
A corresponding fraction of the Mn(II)ions will be oxidized at the addition
of and instead a brownish precipitation is formed
out of the white manganese(IV)oxyhydroxide.
and instead a brownish precipitation is formed
out of the white manganese(IV)oxyhydroxide.
and instead a brownish precipitation is formed
out of the white manganese(IV)oxyhydroxide.
The precipitates are dissolved by adding phosphoric acid (H3PO4). The iodide ions are then oxidized simultaneously with the dissolution of the
 precipitate, and a dark yellow solution is
formed.
precipitate, and a dark yellow solution is
formed.
The quantitative determination is performed by iodometric titration with a
thiosulfate solution, S2O3 2-, using starch solution as a reaction indicator.

3 Materials & method
The materials used in the laboration:
- Two Winkler bottles
- Two 250 ml Erlenmeyer bottles
- One optional pipette
- Two transfer pipettes minimum 1 ml
- One minimum 5 ml pipette
- One Peleus ball
- Two 5 ml volumetric pipettes
- One 50 ml burette
- One funnel
- Two stirring magnets
- A magnetic stirrer
- A scale
Chemicals and solutions used:
- Alkaline potassium iodide solution
- Sodium thiosulfate solution: 0,0100 M

- Manganese(II)chloride solution:

- Phosphoric acid:

- Starch solution: 0.2%
- Sampled water made by laboration assistant
Protective gear:
- Lab coat
- Safety glasses
- Latex gloves
When
performing a laboration it is important to prepare all the materials beforehand
to ensure that the working process will be as smooth as possible. Considering
that different chemicals and solutions are being used in this laboration, both
latex gloves and safety glasses are needed in addition to the lab coat. The
sampled water had been diluted 10 times by the lab assistant which had then
been standing at room temperature for 4 days.
The execution of the laboration can be broken in to two main parts: sample
preparation and iodometric titration. The safety glasses and gloves should be
used in the former part.
3.1 Sample titration
Start by marking the two Winkler bottles with a whiteboard marker to help
keep them apart. Proceed by weighing the bottles together with their plugs.
Fill the bottles up carefully with the sampled water with a pipette of your
choice. In this step it is important to minimize any additional oxygen that
could be added to the water. Put the plugs back on so that there won’t be any
air bubbles left in the bottles.
Remove the plugs once again and add 1 ml of the iodide solution to the
bottom of each bottle with a transfer pipette. Take the other transfer pipette
and add 1 ml manganese(II)chloride solution to the upper part of each bottle.
Wipe the bottle dry if some of the content leaks out when the plugs are put
back on. To mix the chemicals, hold the plugs down and turn the bottles upside down at least 20 times. This is to assure that the content
will get thoroughly mixed. Let it settle for 5 to 10 minutes. During this
waiting time, start preparing the titration by filling the burette up with the
sodium thiosulfate solution using the funnel up to the 0.00 ml mark.
When the precipitate has settled, remove 5 ml of the clear solution from
each bottle with a pipette as shown in image 1. Add 5 ml phosphoric acid to
each bottle and mix them until it becomes a homogeneous mixture.
 |
| Figure 1: Removing 5 ml of the clear solution with a pipette. |
3.2 Iodometric titration
If the previous steps were followed, the
burette should be filled with the sodium thiosulfate solution. Pour over the
solutions from the Winkler bottles to the Erlenmayer bottles and place a magnet
in each. Set the magnetic stirrer under the burette and place one of the
E-bottles on top of it.
Turn on the stirrer and add thiosulfate solution until the sample get a
light yellow color as seen in image 3. When the sample has taken its light
yellowish color, start adding a dozen of drips of starch reaction solution to
make the color violet as seen in image 4. This is just too easily decide how
much more of the remaining thiosulfate solution should be added to the sample.
When the sample has fulfilled its required violet color, start adding thiosulfate
solution again until the solution gets completely colorless as seen in picture
5. Now all the remaining Iodide ions has react with the corresponding thiosulfate
ions. Repeat the titration with the remaining E-bottle.
 |
| Figure 2: After adding and mixing in the phosphoric acid. |
 |
| Figure 3: Comparison of the titrated and untitrated solutions. |
 |
| Figure 4: The color of the solution after adding drips of starch. |
 |
| Figure 5: Colorless solution after continuing the titration. |
4 Calculations
(1) How many moles of sodium thiosulfate
was used in each sample?
The number of moles that were used during the titration can be calculated
using the formula  , where C is the concentration and V the
volume of sodium thiosulfate.
, where C is the concentration and V the
volume of sodium thiosulfate.
, where C is the concentration and V the
volume of sodium thiosulfate.
(2) How much water was used before
starting the titration?
To calculate the weight of water used in the experiment, we took and
calculated the mass difference before and after filling the wrinkle bottles.
For this we needed to weigh the bottles while empty and then again after we’d
fill them with the water.

Now that the mass of the water is known we can use it together with the
density acquired from a table sheet to put up a formula calculating the volume;

(3) How many moles oxygen were present
during the titration?
From the equation 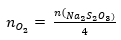 we calculated how many moles of oxygen where
in the samples. This was possible because the number of moles sodium
thiosulfate was known.
we calculated how many moles of oxygen where
in the samples. This was possible because the number of moles sodium
thiosulfate was known.
we calculated how many moles of oxygen where
in the samples. This was possible because the number of moles sodium
thiosulfate was known.
(4) What was the concentration of the
oxygen before and after the experiment?
For the initial concentration of oxygen we used the formula given by our
experiment supervisor, .
Where,
.
Where, is the solubility of oxygen at the air
pressure
is the solubility of oxygen at the air
pressure in
in and S is the solubility of oxygen at
 .
.
.
Where,is the solubility of oxygen at the air
pressureinand S is the solubility of oxygen at.
The final concentration of oxygen could be calculated trough where the mass,
 of oxygen was calculated using the mole acquired
earlier multiplied with the molar mass of oxygen
of oxygen was calculated using the mole acquired
earlier multiplied with the molar mass of oxygen acquired from the
chemical data sheet.
acquired from the
chemical data sheet.
where the mass,of oxygen was calculated using the mole acquired
earlier multiplied with the molar mass of oxygenacquired from the
chemical data sheet.
5 Results and discussion
Number of moles sodium thiosulfate used in
each titration.

Mass, volume and moles of the water used.

The table values used when acquiring the volumes whereas follow;
 which is the density of pure water at the
pressure of 1 atm (atmosphere).
which is the density of pure water at the
pressure of 1 atm (atmosphere).
The amount of oxygen
atoms in the separated
samples were;
For (4),
 Where the solubility (S) of the oxygen was
 at a temperature of 19°C, and the air pressure
was given from our supervisor at a value of 102, 4 kPa.
at a temperature of 19°C, and the air pressure
was given from our supervisor at a value of 102, 4 kPa. The molar mass for one oxygen atom is approximately
 so for the oxygen in its molecular form
 we doubled this value according to the formula
  .
.
And got that the molar mass for oxygen is
is
Here on we calculate the mass of the total number of oxygen in each sample.

For the final concentration of oxygen in each sample we reached the values;

Comparing the theoretical value for concentration
with our experimented value C:
The result shows that the test is a failure, the reason of the negative
value is that oxygen was added during the resumption of the sample in the Peleus
ball. the following actions resulted in a wrongly collected chemical data, and
the final calculation stage resulted in a higher concentration of oxygen before
the test than after even though the Manganese(II)chloride and thiosulfate ions
has reacted with the oxygen and hence decrees the concentration of oxygen.
References
Penn, M., Pauer, J.,
Mihelcic, J. (2003). Biochemical
oxygen demand. Encyclopedia of Life
Support Systems. Available from: http://www.eolss.net/sample-chapters/c06/e6-13-04-03.pdf (13 October 2015)
Inga kommentarer:
Skicka en kommentar